FREE Eyeball Coaster Crochet Pattern
Perfect for Spooky Season Market Prep!
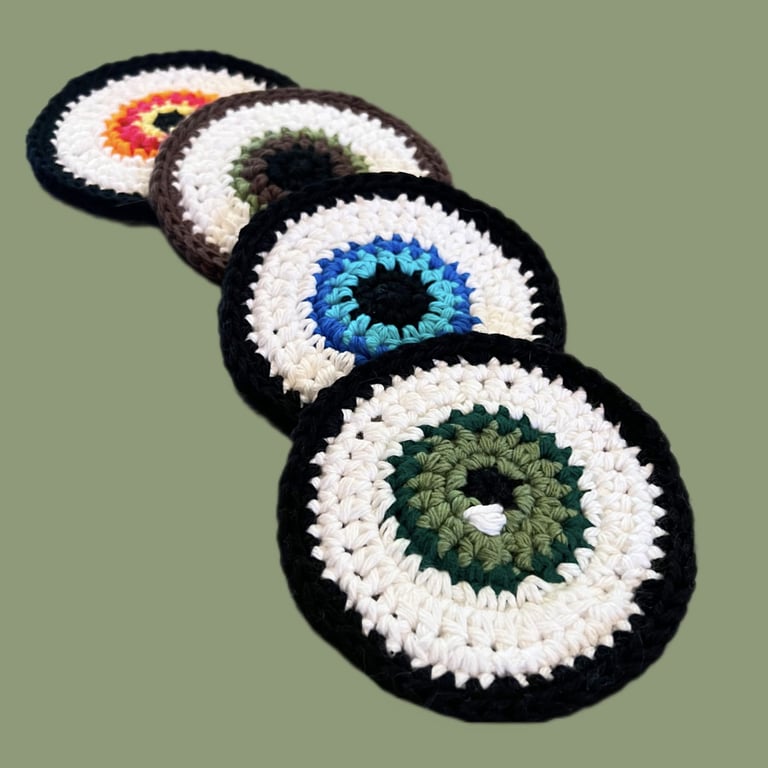

These coasters are perfect for Halloween decor or market prep! They work up super quick and are easy enough for beginners! I also have a smaller version for car coasters here.
Skill Level: Beginner
Suggested Materials:
- 5mm crochet hook
- 4 weight yarn (cotton is preferred to create a sturdier coaster that is
more resistant to moisture)
- Scissors
- Darning needle
Optional Materials: - Red thread for embroidered eye veins
Stitch Abbreviations
- MC: Magic Circle
- SC: Single Crochet
- slst: Slip Stitch
- st: Stitch
- Ch: Chain
- HDC: Half Double Crochet
- INC: single crochet increase
- HDCINC: Half Double Crochet Increase
Finished product size: 4.00’’-4.25’’
*Some notes and tips before you get started *
- The chain 1 at the beginning of each row is for height; It does not
count as a stitch
- Changing the placement of the increases in every other row helps
keep the shape rounded. On the rows where there is an even number
of single crochets, we will be placing the increase in the middle (ex:
SC, INC, SC…. SC x2, INC, SC x2). To help keep count, I count the
total number of SCs around the increase. For example, instead of
saying “one, two, increase, one, two” and then repeating, I say “one,
two, increase, three, four” and then repeat. This should help avoid
losing your place when counting!
Pupil
R1: 6 SC in MC, slst to beginning st [6]
**If you want a bigger pupil and are only using 1-2 colors for the iris, continue
using pupil color for the next row. If you want a smaller pupil and/or are using 3
colors in the iris, change colors here by completing the slst from R1 with the new
color. Crochet over the tail of your new color during color changes**
Iris
R2: Ch1, INC x 6, slst using iris color if you haven’t changed color already (or
middle iris color if using 3 colors) [12]
R3: Ch1, (HDC, HDCINC) x 6, slst with outer iris ring color [18]
R4: Ch1, (SC, INC, SC) x 6, slst with white color [24]
White
R5: Ch1, (SC x 3, INC) x 6, slst to beginning st [30]
R6: Ch1, (HDC x 2, HDCINC, HDC x2) x 6, slst to
beginning st [36]
R7: Ch1, (SC x 5, INC) x 6, slst using border color [42]
Border
R8: Ch 1, (SC x 3, INC, SC x 3) x 6 [48]
R9: slst around, slst to beginning st and fasten off [48]
You are now ready to weave in your ends! Feel free to embroider any details
you’d like now, such as veins or reflection spots. Below is a helpful YouTube
tutorial I found for the veins!
Veins: “How to embroider veins on an eyeball or anything else” by Cloudy lil
crafts